VPC - NAT Gateway and NAT Instance
Scalability application:
When an application gives best performance when throughput
(input and output, which means requests and responses) increases is
called Scalability application
Always AWS application or architecture will meet below metrics to meet best app/design perspective.
-
Fault tolerance
-
Scalability
-
Cost effective
-
Availability
Fault tolerance
Scalability
Cost effective
Availability
NAT gateway and NAT Instance.
-
NAT Instance: It is a IaaS (Infrastructure as a Service) where we have to take overhead to maintain this.
-
NAT gateway: It is a PaaS(Platform as a Service), where we no need to take overhead and AWS will take care of it.
NAT must sit in the public subnet.
NAT allows only outbound connection.
NAT Instance: It is a IaaS (Infrastructure as a Service) where we have to take overhead to maintain this.
NAT gateway: It is a PaaS(Platform as a Service), where we no need to take overhead and AWS will take care of it.
NAT Instance implementation:
In a VPC , all the subnets will communicate each other by using default router.
Any subnet we can make it as public , when that subnet is connect to Internet Gateway.
We can configure secure access to internet by using NAT instance.
For ex: If an Ec2 which is in private subnet wants to connect to Internet ,
it will communicate with private router(custom router) which
again communicate with NAT instance , that is having connection with Internet.
Below architecture , shall implement in AWS.
So lets start creating of VPC as below
1.Login to AWS console
2.Search for VPC under services
See the below screen
Select VPC It will show below screen
Select create VPC and enter the details like below pic.
then click on "Create" button , The below screen appears
Then select one Private and one Public subnets to meet the requirement.
To do that , select "Subnets"-->Create subnet , Following screen appears
and fillout the details as mentioned below.
As per the screen , we are creating public subnet for now
also just by the name it won't become a Public subnet ,
it has to connect with Internet Gateway then it will become a public.
Then select create Button.
So Now go for another subnet where we will treat this as a private subnet.
Create as above and just name it as a Private-subnet and change the IP address.
At present these to subnets(Private/public) are connected with default/Main router.
So, As per the design we need to connect Private subnet with another router, let us create the same now.
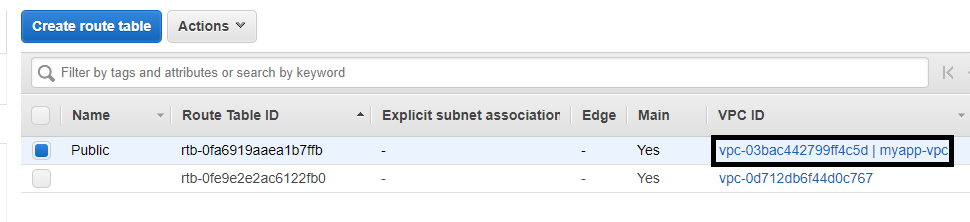
The default route table already created when we create VPC(myapp-VPC)
,So as i mentioned above default route table is connected to all the subnets ,
to differentiate and meet above requirement lets create another route table with name "Private",
For easy recognition we shall name the existing route table as "Public".
Click on Route tables-->Create Route table
Name:Private (for easy recognition)
VPC:VPC ID of my app-vpc
Click create
But this Private route table is not associated with any subnets.
Always remember that custom route table is No as Main and it is not connected to any subnets.
So Now let us associate
-
Private subnet with private route table
-
Public subnet with public route table
To do that , select Private route table -->below click on subnet associations -->Edit subnet associations
select Save button. By default another subnet(public) is associated with "Public route table".
Now Lets create Internet gateway(IGW) and associate with Public subnet.
So select Internet Gateways -->Create Internet gateway
then click "Create Internet Gateway" button, Once its created it won't associate with any VPC ,
we have to associate explicitly like below
Select "Attach internet gateway"
So , Now we need to connect this to our public route table.
Destination: 0.0.0.0/0 means public IPaddress which will connect to internet.
Target: select IGW which we created by selecting "internet gateway" from dropdown.
The default route which will allow communication between subnets by default and we won't delete that.
NAT instance is regular EC2 instnace with NAT configurations/capability.
launch NAT instance as below
After selecting above , under "Configure Instance Details" select as below
and move ahead with storage and other details.
under Security group select as below
Now connect private router with NAT instance to access internet , this will help to connect private subnet with Internet when there is a need.
Source and Destination Check
-
Each EC2 instance performs source/destination checks by default.
-
This means that the instance must be the source or destination of any traffic it sends or receives. However, a NAT instance must be able to send and receive traffic when the source or destination is not itself.
-
Therefore, you must disable source/destination checks on the NAT instance.
Select "Yes Disable" .
Now we have to connect with NAT instance from putty. From there we can connect with Private Instance.
For this , we need to create a file with same name as key pair
open the same .pem file in notepad.(Which is existed).
copy the content and paste it in .pem file which you are creating.
then ssh to the private instance like below
ssh -i k8s.pem ec2-user@192.168.1.197
Above permission denied screen because the pem file is not having the access.So, change the same by using below
chmod 400 k8s.pem
So Now again connect to private instance by ssh , Now you are able to connect and ping to google for checking the internet connection.
So, If we have any softwares or apps which needs internet connection we can connect and install or update by using this connection.


Private subnet with private route table
Public subnet with public route table


Each EC2 instance performs source/destination checks by default.
This means that the instance must be the source or destination of any traffic it sends or receives. However, a NAT instance must be able to send and receive traffic when the source or destination is not itself.
Therefore, you must disable source/destination checks on the NAT instance.


NATGateway:
-
This is not free for Free tier user , but you can try if you want to pay.
-
It involves Hourly basis charge.
-
It involves amount of data which is processed through NAT gateway.
NAT gateways --> Create NAT gateway -- enter the below details.
Click on "Allocate Elastic IP address" , it will automatically allocate and select Create NAT gateway like below.
Connect NAT gateway with Private route table like below
This is not free for Free tier user , but you can try if you want to pay.
It involves Hourly basis charge.
It involves amount of data which is processed through NAT gateway.


Private IP:
-
Is the IP visible within VPC
-
By default every EC2 will get Private IP.
-
AWS uses DHCP for allocating private IPs
-
DHCP(Dynamic Host protocol) responsible for randomly finding unique IP for EC2 in a subnet.
Is the IP visible within VPC
By default every EC2 will get Private IP.
AWS uses DHCP for allocating private IPs
DHCP(Dynamic Host protocol) responsible for randomly finding unique IP for EC2 in a subnet.
Public IP
-
Accessible over Internet
-
It is assinged to EC2
-
We choose public IP at the time of launching EC2 after launching EC2 we can't use.
-
This will change if we start and stop EC2
Accessible over Internet
It is assinged to EC2
We choose public IP at the time of launching EC2 after launching EC2 we can't use.
This will change if we start and stop EC2
Elastic IP
-
Is a static public IP
-
it won't change even if we stop EC2.
-
If we release Elastic IP, it will delete
-
If we deassociate Elastic IP It will be there
-
If we deassociate Elastic IP but not in use , still charges applicable for Elastic IP
-
This will be created by AWS separetly for your account
-
In one account one Elastic IP is free
-
Second EIP onwards charges applicable
-
Even for first EIP if that is not associated with running EC2 , it will be charge.
-
We can detach EIp from once instance and attach to other EC2
Is a static public IP
it won't change even if we stop EC2.
If we release Elastic IP, it will delete
If we deassociate Elastic IP It will be there
If we deassociate Elastic IP but not in use , still charges applicable for Elastic IP
This will be created by AWS separetly for your account
In one account one Elastic IP is free
Second EIP onwards charges applicable
Even for first EIP if that is not associated with running EC2 , it will be charge.
We can detach EIp from once instance and attach to other EC2
No comments:
Post a Comment